Bitriseを使ってFirebase Test LabでiOSアプリのUIテストを実行できるようにする方法
BitriseではFirebase Test Labを使ったiOSアプリの実機テストをサポートしています。
ここではその設定方法をご紹介します。
なお、ここではInitialコミット状態のXCodeプロジェクト(新規作成直後のプロジェクト)を使用します。
コード署名用ファイルのアップロード
ワークフローを設定する前に、コード署名用ファイルをBitriseにアップロードしておく必要があります。
ここではBitriseが推奨しているcodesigndocツールを使った方法を説明します。
ツールを実行する前に、XCodeのSigning & CapabilitiesでTeamを設定しておきます。

Teamの設定ができたら、ターミナルで以下のコマンドを実行します。
途中でいくつかの質問に回答する必要があります。質問と回答も以下に併記しているので参考にしてください。
$ bash -l -c "$(curl -sfL https://raw.githubusercontent.com/bitrise-io/codesigndoc/master/_scripts/install_wrap-xcode.sh)"

...
Select the ipa export method
Please select from the list:
[1] : development
[2] : app-store
[3] : ad-hoc
[4] : enterprise
(type in the option's number, then hit Enter) [1] : 1

...
Do you want to collect another ipa export code sign files
(select NO to finish collecting codesign files and continue) [yes/NO]: NO

...
Do you want to upload the provisioning profiles and certificates to Bitrise? [yes/no] : yes

...
Please copy your personal access token to Bitrise.
(To acquire a Personal Access Token for your user, sign in with that user on bitrise.io, go to your Account Settings page,
and select the Security tab on the left side.) : XXXXXX_XXXXXXX(アクセストークンを入力)

...
Select the app which you want to upload the provisioning profiles
Please select from the list:
[1] : BambooCIApp (git@github.com:xxxx/BambooCIApp.git)
(type in the option's number, then hit Enter) [1] : 1

...
That's all.
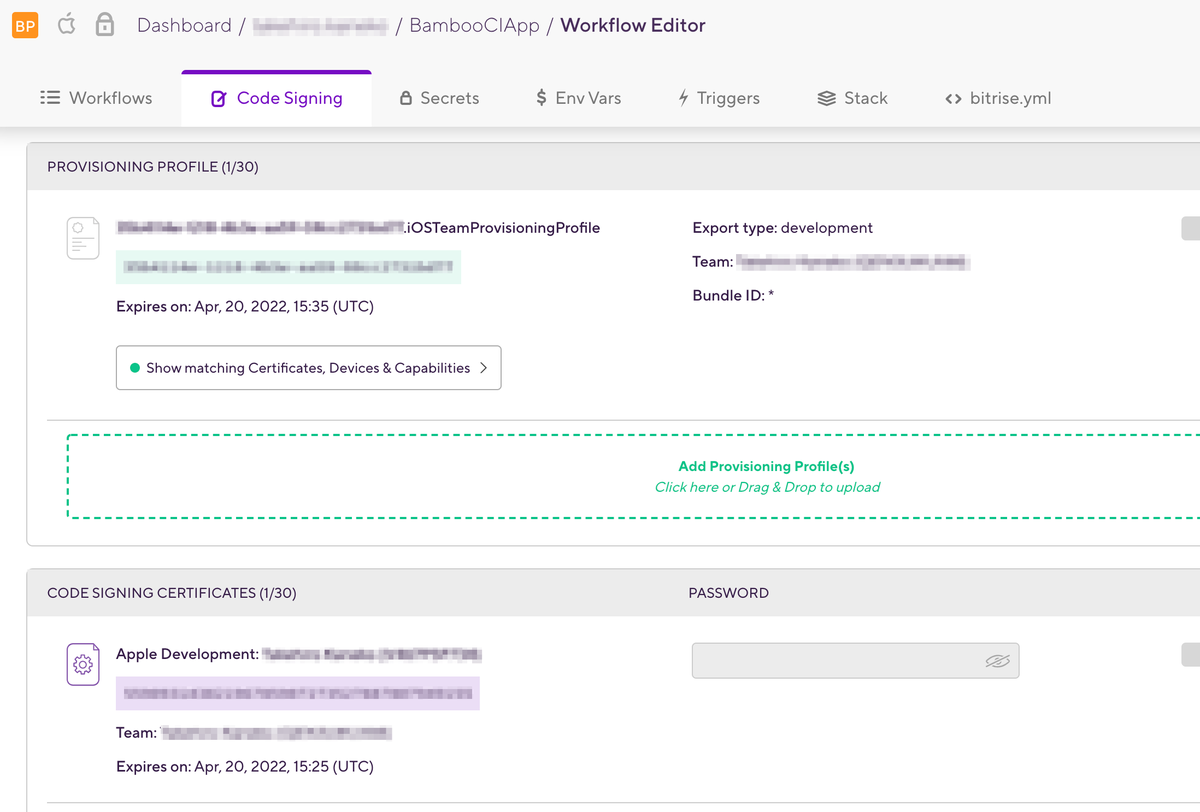
コマンドの実行が完了すると、BitriseのWorkflow EditorのCode SigningタブでProvisioning Profileと証明書が登録されているのが確認できます。
UIテスト実行用Schemeの確認
Schemeに有効なUIテストターゲットが設定されていることを確認します。


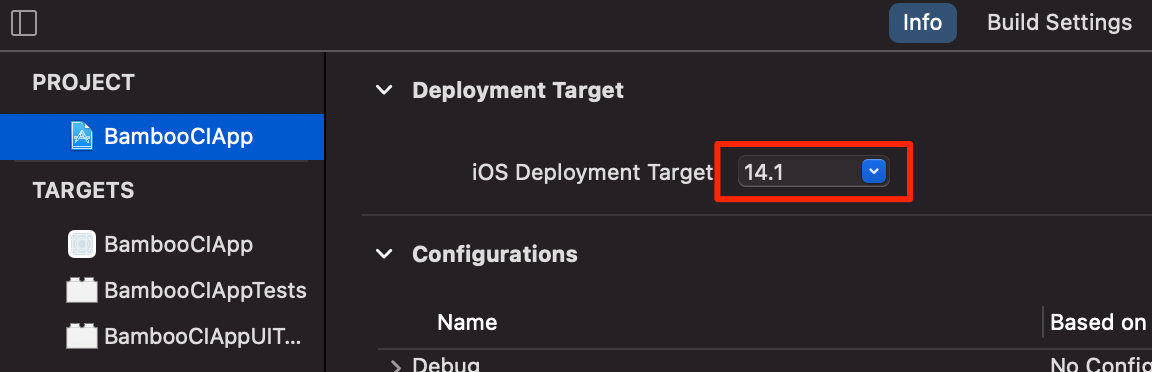
本記事執筆時点では、BitiseのiOS Device Testingがサポートしている最新のiOSバージョンは14.1だったので、Deployment Targetを14.1にしておきます(プロジェクト作成直後だと14.4になっています)。
変更をGithubにプッシュしておきます。
Bitriseワークフローの設定
Certificate and profile installerステップのあとに、以下の3つのステップを追加します。
- [BETA] Xcode Build for testing for iOS
- [BETA] iOS Device Testing
- Deploy to Bitrise.io - Apps, Logs, Artifacts

iOS Device TestingステップのTest devicesの項目で、iphone8,14.1,en,portraitを指定します。

ワークフローの設定はこれだけです。
ビルドを実行する
ワークフローの設定ができたので、ビルドを実行してみます。
ここではブランチ名をfeature/ios-device-testing、ワークフロー名をtestlabとしていますが、ご自身の環境に合わせて変更してください。

iOS Device Testingステップのログ。

テスト結果はBitriseのTest Reportsページで見ることができます。

Firebase TestLabタブでは、実行されたテストケースの一覧や、UIテスト実行時の動画を見ることができます。

まとめ
(実はDeployment Targetを14.1にしていないかったことが原因でUIテストが実行されず長いことハマっていたのですが...)
用意されているステップを追加するだけで、Firebase Test Labを使った実機テストが簡単に実装できました。
ステップはまだβ版ではありますが、動作は安定しているとの記載があるので、安心して使って良いのかなと思っています。
いまは特に料金などかかりませんが、GAになったときに料金体系がどうなるのかが気になるところです。